Here are a several videos from youtube that you may find useful to watch before you attempt fitting graphics. There are many hundreds of videos on youtube with loads of great fitting tips, here are just a selection:
Fitting anything larger than a bumper sticker can be tricky for some inexperienced fitters. For a guaranteed top class finish it is best to get your graphics fitted by a professional fitter, we have a list of partners below.
Bloxwich based approved fitter:Contact Roper (07954 137458) at ABC Tinting & Wrapping for prices & information.
Cornwall based approved fitter:Contact Steve (07818 552636) at That Tint Guy for prices & information.
Doncaster based approved fitter:Contact Craig at UNISIGN for prices & information.
Sutton-in-Ashfield based approved fitterContact Jonathan at www.rustyphat.co.uk for prices & information.
Wolverhampton based approved fitter:Contact Brian at www.applesigns.co.uk for prices & information.
Sutton Coldfield based approved fitter:Contact Dave at www.branditsigns.co.uk for prices & information.
Derby based approved fitter:Contact Henry at Evolve Automotive for prices & information.
South Wales (Merthyr Tdyfil) based approved fitter:Contact Richard at Infinite Tints & Wraps for prices & information.
North West Spain (Pontevedra):Contact Rodney at Autovinilos for prices & information.
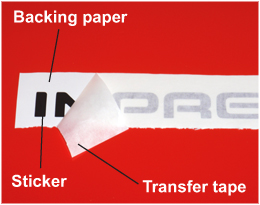
If you want to have a go at fitting the stickers yourself, below are some important tips and tricks below to help you get it right first time. Most of our graphics are made up from cut shapes and/or lettering, and so are covered with application tape which holds all of those shapes in place.
PREPARATION IS ESSENTIAL:
Giving your vehicle a wipe with a microfibre cloth before fitting the stickers will remove surface dust, but this does NOT mean that you have properly cleaned and prepped. Once the vehicle has been cleaned, professional fitters then recommend a cleaning process using 3 types of cleaning chemicals available from Hexis:
Wax-based and other car polishes will form a barrier that prevents the vinyl adhesive binding to the car. If the vinyl wont stick to the vehicle, its usually because it hasnt been cleaned properly.
A NOTE ABOUT AVOIDING AIR BUBBLES:
Novice fitters often have problems with air bubbles getting trapped under the vinyl, spoiling the look of the stickers. Please note this is not a reflection of the quality of the vinyl, it is a fitting problem.
BUT DONT DESPAIR!!!Many air bubbles will shrink and disappear after a while – vinyl is slightly porous and air will slowly leak from the bubbles in the same way air leaks out of a party balloon.
The best way to avoid air bubbles in the first place is to do a ‘wet application’ fitting method. Simply spray the prepared car surface with water before following the steps below. The water temporarily reduces the adhesion of the glue, and allows you to push both the water and air bubbles out using a squeegee applicator tool (or credit card). If you use too much water the vinyl will not stick to the car, simply wait for it to dry before trying to remove the application tape.
It is important to keep the backing paper dry – if water soaks into the backing paper it will cause paper fibres to stick to the adhesive on the vinyl. If you have a printed AIR RELEASE wrap, these need to be fitted DRY.
This method can be used to apply stickers of any size or shape.
Before you start…
Prep, prep and more prep… Make sure your car is clean. It has to be spotlessly clean, with all wax removed (see link above for suitable cleaning chemicals). Good preparation is the most important part. Be careful attempting this job outdoors – a well timed gust of wind or stray flying insect can really spoil things.
Take your time, dont rush it! Pro fitters have a lot of experience and make it look easy. Dont think you can work as fast as them and get the same results. Patience and common sense are also essential parts of the fitting process.
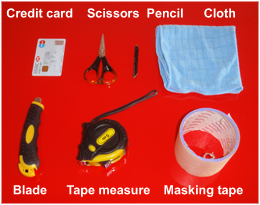
You will need the following equipment:
Steps 1-15
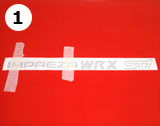
1) Put your sticker in position and secure one end and the middle with masking tape. For larger stickers youll need to use some small pieces of masking tape and place them around the edge of the sticker to mark the final position. Rub the transfer tape with your fingers to make sure the sticker binds to it securely. This is important as it makes the next step easier…
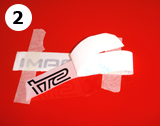
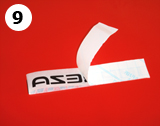
2-3) Slowly and carefully peel the backing away from the transfer tape. Make sure that the sticker is stuck to the transfer tape and does not stay on the backing paper. See how we flip the decal over in step 2 and then peel the backing paper off. This is important and will help to make sure all letters are stuck to the transfer tape. Take special care when your sticker has fine detail or lettering, as letters can tear or get left on the backing paper.
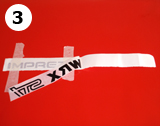
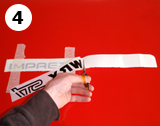
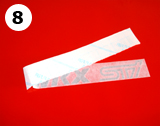
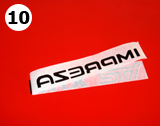
4) Using the scissors, trim off the loose backing paper as shown.
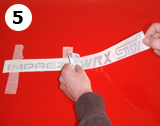
5-6) Give the surface another quick wipe to get rid of any unwanted dirt/dust/insects. Then use the credit card or sign applicator to apply the sticker to the surface, working from the centre to the edge.
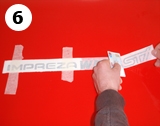
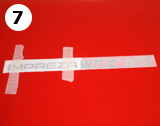
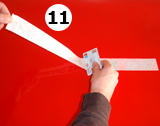
7-9) Remove the masking tape that held the sticker in position, fold the sticker over and peel off the rest of the backing paper as shown. Again, take care doing this as you don’t want to leave part of your decal still stuck to the backing paper!
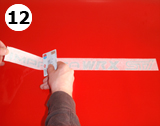
10-12) After giving the surface a quick wipe, apply the rest of the sticker using the credit card, working from the centre to the edges as before.
13-15) Rub the sticker with the cloth to bind it to the vehicle, then slowly peel back the transfer tape to reveal your new fitted sticker.